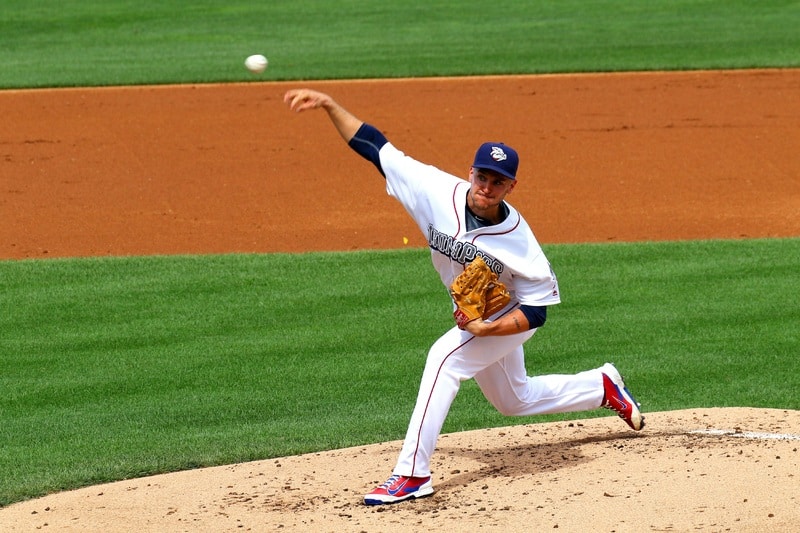
Any physical activity comes with an inherent risk of injury, and baseball is no exception. This is especially true for pitchers, who use the same muscles and repeated motions throughout a game. Using the wrong technique or not properly caring for themselves can lead to detrimental effects on the pitching arm.
The below 12 tips are how to protect your pitching arm between and during games—including ways to avoid putting any extra strain on the shoulder, elbow, or wrist areas—so you are always playing at your best.
1) Get in the Habit of Conditioning
When it comes to baseball, no single game will ever be over in a short time frame. Additionally, there will likely never be a matchup where only a little exertion is required, especially for pitchers.
With that said, pitchers should condition themselves to make sure they are in the best shape possible before hitting the field. Being in excellent condition ensures that not only the arm is prepared for a nine-inning game, but the entire body is as well.
Athletes will condition in different ways, depending on the muscles they expect to use the most during a game. Because pitchers will mostly use their arm muscles for throwing and legs and feet for moving about center-field, conditioning might entail the following exercises:
- Running short distances (adding a mix of sprints): Pitchers are usually sedentary on the mound but occasionally use quick bursts of energy when they pitch and run to catch a nearby ball.
- Building a tolerance to throwing various pitches: Pitchers should develop a plan where they are not throwing every day, but practicing often enough to eventually build a tolerance to throwing a high amount. Conditioning exercises for this include light tossing, long tossing, and weight lifting.
2) Stretch and Warm-Up Properly to Protect Your Pitching Arm
As any professional athlete will tell you, warming up and stretching before practices or games are vital to ensuring you can avoid sprains or injuries on the field.
This is extremely important for pitchers because, as mentioned earlier, they use the same muscles and motions for throwing—without properly stretching or warming up, pitchers can quickly strain these muscles.
Warm-Ups for Shoulders
Most major league pitchers follow Jobe Shoulder Exercises. This is a great way for pitchers to maintain their pitching arm’s health, and it involves very little movement. The goal of these exercises is to strengthen the shoulder and rotator cuff to prevent injury.
Warm-Ups for Arms
Many pitching experts and coaches suggest that the best way to stretch and warm-up the arms is to find exercises that use resistance bands. These tools can help you strengthen and build muscles in the arms by forcing them to move opposite of how they normally would during a pitch.
Warm-Ups for the Lower Body
The arms are not the only parts of the body that require a good stretch and warm-up; your whole body should go through the process of warming up. Pitchers, in particular, should also focus on the lower body:
- Legs: Warming up the legs is a great way to prevent them from getting injured. Basic leg stretches are great, but doing other exercises like lunges, sprinting, and air squats can help prepare them to be used during a game or practice.
- Hips: Ideally, you want to use large resistance bands to help stretch out the hips; this will improve your range of motion and build strength in this area.
- Core: When it comes to this area of the body, basic core exercises or warm-ups should do the trick, such as Russian twists and planks.
3) Add Weight Training to Your Exercise Regimen
Along with stretching and conditioning, proper weight training in the offseason and during the season can make a huge difference. The difference is not only in how well you pitch, but how good your arm will feel at any point during games.
With weight training, there are a few areas pitchers should focus on to ensure the pitching arm is as stable as it can be and reduce injuries.
- The first area to focus on is the shoulder. Because a pitcher will use their shoulder every single time they throw, building up the muscles in that area (both front and back shoulder) can help prevent injuries.
- The upper- (bicep and triceps) and lower-arms (forearm) are also important as they help with the control and contortion of the arm to perform various pitches.
- Two other spots a pitcher should focus on is their elbow and wrist. These two areas are key in contributing to the effectiveness of certain pitches and how they perform.
The following are a few weight-training exercises that can target most—if not all—of these areas:
- Pushups: This exercise helps build up the muscle in the chest and shoulder areas.
- Basketball Cuff Dribble: This exercise involves a small, weighted ball and a sturdy wall. The pitcher should form a 90-degree angle with their pitching arm about 3-6 inches away from the wall. Then, simply bounce the ball off the wall repeatedly (like dribbling a basketball). This exercise helps maintain your pitching form while building muscle in the upper and lower arms.
- Toss Back: Using the same small, weighted ball as the previous exercise, the pitcher should hold the ball in their pitching hand, with their arm out to the side and their elbow at a 90-degree angle. With a partner standing about ten feet behind them, the pitcher will toss the ball back to the partner, only using their shoulder muscles to do so. This exercise helps build the shoulder muscles.
- Medicine Ball Slams: Just as the name suggests, for this exercise, take a medicine ball and slam it down on the ground with one hand. This is a great way to build the necessary muscles for pitching, as it simulates a single pitch; it takes great exertion to complete the task of slamming the medicine ball down, similar to throwing a baseball.
These are only a few examples of weighted exercises all pitchers should be doing to build muscle and maintain their pitching arm’s health. For a more in-depth weight training program, talk to a personal trainer in your area and work with them to develop a personalized weight training regimen.
4) Condition and Exercise Your Whole Body
Just like with other sports, baseball requires movement from more than one part of the body. For pitchers, it is not only their arm or shoulder that propels their pitch and contributes to successful throws; it is their entire body.
With that said, make sure to regularly condition and exercise other parts of the body, like your back muscles, which will also help to protect your pitching arm.
For the lower body, it helps to lift weights to build your leg muscles. In turn, you can improve how well you push off your foot from the ground as you contort your body through your pitching motions. The force that comes from this part of your body can contribute to the kind of power your pitch has behind it.
Along with the legs, condition and exercise the hips. The hips can help contort your upper body, allowing you to gain pitching velocity and move more fluidly during the pitching motion.
Finally, besides your pitching arm and shoulder, your core, chest, and head are all important to help guide your pitch forward, so they require regular attention as well.
Remember, pitching should be one fluid motion so the entire body needs to be in sync. If one part of your mechanics is off, it can cause your arm motion to be off too.
5) Practice Proper Pitching Mechanics
Pitching mechanics are some of the most important factors when it comes to pitchers producing amazing throws. A pitcher that follows the same steps for every pitch not only has an advantage over batters, but it can also help them maintain a healthy pitching arm.
There are 13 elements, or “steps”, of pitching mechanics:
- Starting stance
- Wind up
- Leg lift
- Maximum knee height
- Stride
- Stride foot contact
- Arm cocking
- Maximum external rotation
- Arm acceleration
- Release
- Arm deceleration
- Maximum internal rotation
- Follow-through
These steps to throwing a pitch are important in producing the same mechanical motions for each throw. With consistent movements, you significantly reduce the chances of injury.
If you find that there are inconsistencies with your pitching mechanics, go through your entire pitching motion, step by step, and fix each problem as it arises. Do not move on to the next mechanical element until the previous one is resolved.
This will ensure that you do not put too much of a strain on your pitching arm and helps your muscles retain the memory of the movements they are supposed to go through while throwing, which improves your overall technique.
6) Limit Pitch Counts
The topic that always seems to come up whenever watching a baseball game: how many pitches has the pitcher thrown? There is a reason that pitch count is a hotly debated issue in baseball – it can be detrimental to a pitcher if not properly controlled.
When you first start pitching, there is no real sense of how one should do it; simply throw as hard as you can until you cannot do it anymore, right?
This way of thinking is how The American Journal of Sports Medicine has revealed that roughly half of pitchers between the ages of 7 and 14 report pitching with pain. And it is not just youth pitchers. At the major league level, there has been a spike in the number of injuries and surgeries conducted on pitchers.
The best way to avoid all this? Control how many pitches you throw in a day.
Even if you feel like you can keep going after a certain limit, it is always better to stop while you’re ahead and prevent unnecessary strain. The following chart shows the max number of pitches recommended for various age groups for each day of practice, in addition to how many days of rest pitchers need after hitting the max.
| Age | Daily Max | 0 Days Rest | 1 Day Rest | 2 Days Rest | 3 Days Rest | 4 Days Rest | 5 Days Rest |
| 7-8 | 50 | 1-20 | 21-35 | 36-50 | – | – | – |
| 9-10 | 75 | 1-20 | 21-35 | 36-50 | 51-65 | 66+ | – |
| 11-12 | 85 | 1-20 | 21-35 | 36-50 | 51-65 | 66+ | – |
| 13-14 | 95 | 1-20 | 21-35 | 36-50 | 51-65 | 66+ | – |
| 15-16 | 95 | 1-30 | 31-45 | 46-60 | 61-75 | 76+ | – |
| 17-18 | 105 | 1-30 | 31-45 | 46-60 | 61-80 | 81+ | – |
| 19-22 | 120 | 1-30 | 31-45 | 46-60 | 61-80 | 81-105 | 106+ |
(Source: Major League Baseball)
To read this chart, start at selecting the age range. The 2nd column will show the max number of pitches a pitcher should throw in a single day while the other rows show the range of how many pitches should be thrown after resting the arm for a certain number of days. For example, if a 13-year-old has had 3 days of rest then it’s recommended they throw between 51 and 65 pitches that day.
7) Limit All Throwing Motions
Limiting throwing motions is especially important if you play other baseball positions besides pitcher. All throwing motions can contribute to the overall health of the pitching arm, so limiting the amount of throwing done through drills, practices, warm-ups, other positions, etc, can help protect your arm’s health.
But, this does not mean that on off-days, you should just sit around and do nothing. Tossing the ball lightly and continuing to stretch and keep your arm muscles warm is important so you do not lose any progress in becoming a better pitcher.
A good way for a pitcher to stay in the game during off days is to continue practicing as a fielder with the rest of their team; this can be helpful in two facets:
- For one, it helps the pitcher feel like they are a part of the team and not just a player who plays occasionally.
- It allows the pitcher to work on the fielding part of the game, which will come into play when pitching.
8) Take Time to Learn New Pitches
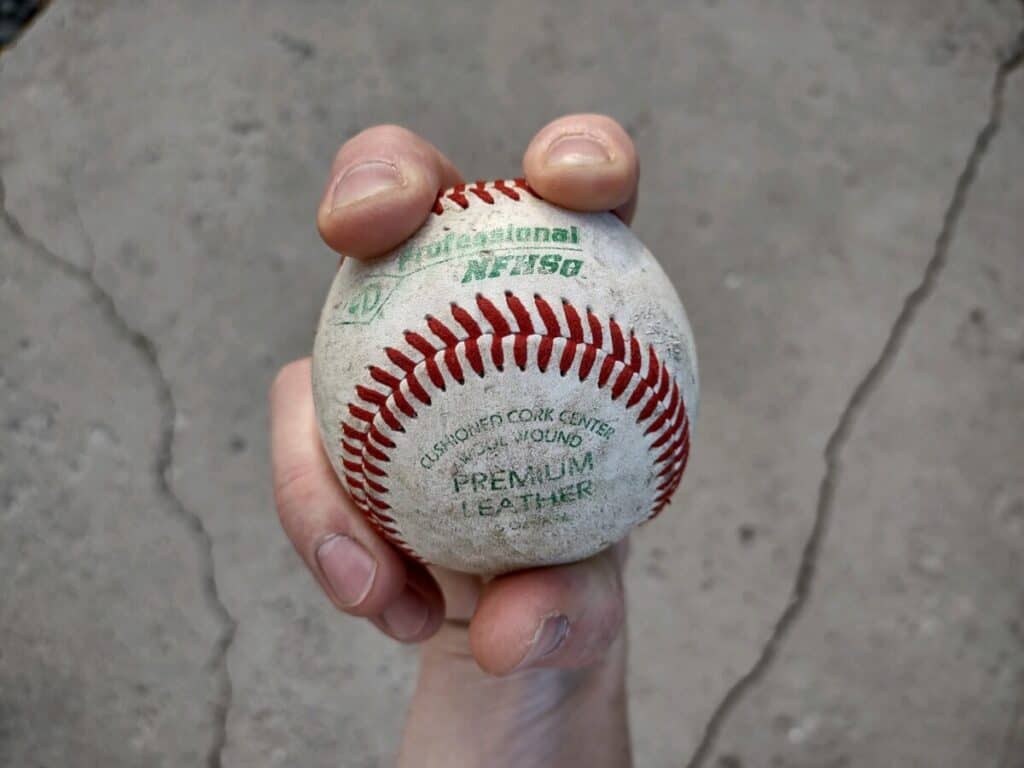
The pitching arsenal of a player is a great determining factor if that pitcher ever wants to continue playing beyond high school. The more pitches one can learn effectively, the better their chance of playing in college and beyond.
But, when it comes to the safety and health of the pitching arm, there are a few cautionary things one can do when learning new pitches:
- When learning a new pitch, the first thing to do is to ensure the specific pitch’s mechanics are down pact. This means starting the throw from one knee, learning how the shoulder, elbow, and upper body function when throwing the pitch.
- You can then progress to throwing from your feet, but standing still and eventually moving towards striding into the throw.
These extra precautions can help a young pitcher learn how their body is supposed to respond to a pitch and how it should feel after throwing. This can be essential for later in their career, where if something does not feel normal, a pitcher can quickly understand what didn’t go right and make small tweaks to ensure their form is correct.
Along with ensuring that you take your time picking up new pitches, another technique to do is to shorten the distance thrown as new pitches are learned. This can help protect the pitching arm’s health because you will not feel you have to over-exert yourself to reach the plate from the pitching mound. You can also use this opportunity to focus on your technique rather than your reach.
9) Have a Rest and Recovery Schedule
Perhaps the most important aspect of maintaining the health of a pitching arm is rest and recovery. In the major leagues, starting pitchers have a strict five-day rest and recovery week:
- Day 1: Pitch
- Day 2: Rest, light stretching, watch the previous outing with coach
- Day 3: Play catch, warm up with stretching
- Day 4: Long toss, light weight lifting
- Day 5: Bullpen session (30-50 pitches)
Of course, every pitcher has their own version of this five-day week, but this is the general guideline that major league pitchers follow.
Youth pitchers, in particular, are more likely than not to also be a field player, so coaches and parents should take this into account. Additionally, youth players will not be playing every day (for the most part, players will play two games a week) so their weekly rest and recovery plan should reflect that.
For a two game a week scenario, a youth player’s week might look like the following:
- Day 1: Game 1 – Pitch
- Day 2: Practice (fielding, stretching, light tossing/play catch)
- Day 3: Practice (fielding, stretching, light tossing/play catch)
- Day 4: Practice (fielding, stretching, long toss)
- Day 5: Game 2 – Pitch (if the pitch count from game one allows)
- Day 6: Recover (stretching, light tossing)
In most youth leagues, the number of pitches a pitcher throws in game one of the week can determine if the player can throw in game two of that week (see chart above).
If a youth player is playing in a multi-day tournament, like on a traveling baseball team, the rest and recovery plan will change slightly. In this scenario, the team plays two games on day one and two games on day two, which means that a pitcher probably will not pitch twice in the tournament:
- Day 1:
- Game 1 – Pitch
- Time in-between: stretch, recover
- Game 2 – Play in the field
- Time in-between: stretch, light tossing
- Day 2:
- Game 1: Play in the field
- Time in-between: stretch, long toss
- Game 2: Play in the field, pitch later in the game (if pitch count allows)
Again, if the pitch count from game one allows for a pitcher to pitch later on in the tournament, be sure that the time in-between is dedicated to rest and recovery to ensure that the arm remains in good health and that there is no overexertion.
Ideal Recovery Methods for Pitchers
After a pitcher has finished their pitching for that day, the recovery process should begin almost immediately.
For those that have seen major league pitchers ice their shoulders or elbows, this should not be the move for younger pitchers. Whenever a person works out or uses their muscles over a long period, the muscles actually break down and require tissue and nutrients. Icing essentially impedes that process.
Here are a few other things pitchers can do to begin the recovery process:
- Run – After using your muscles, waste tends to build up around them and can impede the recovery process. A light jog helps circulate blood throughout the body and jumpstart the recovery process.
- Massage – Using a tennis ball, lightly roll it over sore spots and the important parts of the pitching arm (shoulder, bicep, forearm, etc.).
- Stretch – Stretching right after finishing a pitch can help ensure the muscles used do not tighten up quickly and lead to damage or harm.
- Refuel/Rehydrate – After working out, your body has lower amounts of nutrients. One way to get them back is refueling and rehydrating. A combination of carbohydrates and protein within 30 minutes of finishing pitching can help your body process them during recovery and promote muscle growth.
- Shower – Showering can have a great deal of effect on a pitcher’s body. Along the same thought process as running, standing under a cold shower for 3-5 minutes and then alternating to a hot shower can help stimulate blood flow and start the recovery process.
10) Do Not Overdo Pitch Velocities
Every young pitcher wants to be the next to throw 100 mph, but there needs to be a few steps in-between to get them to that point. Keeping their arm safe and healthy matters because it allows that pitcher to focus more on the art of pitching rather than recovering from an injury.
Especially for youth pitchers under the age of 15, radar guns should not be used to measure how the pitcher is throwing. The radar guns can provide a false sense of well one is pitching and can lead to overworking and injury. Along with this, youth pitchers tend to overdo things to “progress” quicker, throw harder, and/or prove a point.
Also, the most common way pitchers can injure themselves is from pitching through pain, which is more likely to happen if they attempt to throw harder each time for the sake of trying to gain velocity.
11) Take a Break During the Off-Season – But Do Not Stop Conditioning
Pitching is a unique position to play in baseball. Unlike most professional athletes who can continue to play their respective sport on a year-round basis, pitching almost requires a person to take time off to avoid overworking and injuries.
This can be especially true for youth pitchers, where their bodies are still growing and maturing. Taking a month or two off at the end of the season is a great way to keep the pitching arm healthy and keep the mental health of the pitcher positive as well.
In the offseason, though, pitchers can work on plenty of different things to maintain pitching techniques while keeping the arm safe.
- For one, some experts agree that completely shutting down (stopping pitching cold turkey) for an extended time can actually be detrimental to a pitcher’s health. With this in mind, you do not want to continue on the same weekly plan as you had during the season.
- During the offseason, a good plan would be to focus on weightlifting and conditioning for the upcoming season. Also, try mixing in a few long tosses and bullpen sessions (30-50 pitches) to help ease down from the previous season’s grind and help ramp back up for the next season.
12) Only Pitch When Throwing Muscles Are in Peak Condition
Athletes who grew up with sports always hear that playing through injuries shows how tough they are, earning respect from the coach and teammates. But, playing through serious injuries can lead to more detrimental injuries down the road and can potentially end someone’s career.
For pitchers, injuries and throwing through injuries can be especially harmful. When a pitcher throws, essentially four ligaments take all the strain from the pitcher’s arm. If any of these ligaments get damaged, it can mean potential surgery and missed time on the field. That is why it is important to listen to your body and know when something is off.
For example, if a pitcher has any soreness in their arm, shoulder, elbow, forearm, or bicep/triceps area, the pitcher should immediately stop throwing. This is especially concerning if the pitcher has felt this soreness for multiple days.
There are specific trouble areas that a pitcher and coach should look out for if a pitcher feels soreness:
- Inner Elbow: This, along with any forearm pain, can be a huge red flag for a pitcher because the worst-case scenario is “Tommy John Surgery” and missing 9-12 months from the field.
- Front Shoulder: This part of the shoulder is responsible for pitch acceleration, so any soreness here might be a result of insufficient stretching/warming up, overthrowing, or over-exhaustion.
- Top of Shoulder: This potentially could be a rotator cuff injury.
- Back of Shoulder: While this is not as concerning because the shoulder’s back is responsible for the pitching arm’s deceleration, a pitcher can combat this soreness with a mechanical tweak (finish the pitch) or more resistance band work and reverse throws.
Final Thoughts
Pitchers have the brightest spotlight on them in baseball, and the health of their arms can make or break how well a team does in a season. The 12 tips mentioned above are meant to help pitchers achieve stronger muscles, avoid strain and injuries, and ensure that they can maintain their arm’s health throughout the season and in the offseason.
Perhaps the most important of these tips are resting and recovering, conditioning, and warming up regularly. By following at least these steps, you can avoid overworking your pitching arm and significantly reduce your chances of injury during practices or games.
1 thought on “12 Tips for Keeping Your Pitching Arm Safe”
Comments are closed.