Although professional pitchers in the major leagues make pitching look simple, there is a lot more to the art of pitching than simply throwing a baseball as hard as you can. As someone who has been involved in the sport of baseball for most of his life, I decided to put together this quick pitching guide for beginners on the six fundamentals of pitching in baseball. What are the fundamentals of pitching?
The six key fundamentals of pitching in baseball are the pitcher’s grip, starting stance, windup, pivot, stride, and follow-through. Successful pitchers practice these six fundamentals on a consistent basis.

At first glance, it may appear intimidating to have so many fundamentals surrounding pitching, but with practice and an analysis of each step, it can be easily understood how the mechanics of each step seamlessly flow to provide a smooth and consistent motion. Let’s discuss each of those fundamentals in more detail.
This article is one part of a guide on baseball fundamentals. Read my complete guide on breaking down every baseball fundamental for every position.
Article Contents
6 Fundamentals of Pitching
When watching a Major League baseball game, you may notice that different pitchers have different pitching deliveries. While the way a pitcher delivers a pitch may differ from player to player, the fundamentals of what they do will be the same.
1. Grip the Pitch
Before a pitcher steps up to the rubber, they must have a fundamental understanding of the different methods a baseball can be gripped, as each grip significantly alters the pitch that will be delivered. There are multiple pitch types in baseball, but most pitchers will become an expert at only a handful of pitches.
Unlike when a baseball is held for the purposes of fielding or as a friendly game of catch, pitchers need to analyze the batter, the runners, and the situation to determine which grip will deliver the right pitch in the right situation. They must also be on the same page with their catcher so the catcher knows what to expect.
While not an exhaustive list, the following are some common baseball grips:
- Four-seam fastball
- Two-seam fastball
- Three-finger changeup
- Circle changeup
- Palmball
- Curveball
- Knuckle curveball
- Slider
- Sinker
- Splitter
Some of these grips are easier to handle than others. Therefore, depending on one’s baseball experience, it may be advisable to begin with simple grips such as the fastball grips before moving on to more complex and situational grips like the sinker or slider.
2. The Starting Stance
When stepping up to the rubber, a pitcher should ensure they have good balance, are relaxed, and keep their body squared off to the plate.
As a general rule, as long as the pitcher’s pivot foot is touching the rubber, they can stand anywhere on the pitching rubber. There are some exceptions to that general rule, but this means the pitcher’s feet may be positioned on the left or right-hand side of the rubber depending on the angle the pitcher is comfortable with and which angle will provide the necessary advantage over the batter.
However, for new pitchers, it is advisable that they stand in the middle of the rubber as a starting point and gravitate to a certain side in the future, should that prove beneficial.
The pivot foot should be in front of the rubber, and the free foot should be next to or behind the pivot foot, about shoulder length apart.
The pitching hand should be held deep within the glove which should help the pitcher relax their stance and hide their grip from the batter.
3. Perform the Windup
To begin the windup for pitching, the pitcher’s free foot will move (left foot for right-handed pitchers). If the pitcher is pitching from the stretch, their free foot will move up towards their chest, preparing to throw.
If a pitcher is pitching from the stretch, the next fundamental (pivoting) will not apply because the pitcher is already in a position to deliver the pitch.
If a pitcher is in the windup, their free foot will move by performing a rocker step. To perform a rocker step, a pitcher must take their free foot and move it three to six inches backward, behind the rubber, at about a 45-degree angle.
This shifting of weight should be a small transfer that will help the pitcher move into their pivot.
4. The Pivot
While relatively simple, the pivot is considered the most important part of the pitching motion. To perform the pivot, the pitcher moves their pivot leg (right leg for right-handed pitchers) and places their foot parallel with the pitching rubber.
While performing the pivot, the pitcher must keep their weight balanced and eyes toward the target..
At this point, the pitcher shifts their weight forward onto their pivot foot and lifts their free leg into the air. The leg lift requires a pitcher to lift with their knee and not to swing up their foot.
While the knee lift should be maximized, this should not be to such an extent as to upset the pitcher’s balance, focus, or place them in an uncomfortable stance. Generally speaking, a lift between 60% and 70% of the pitcher’s height is optimal.
5. The Stride
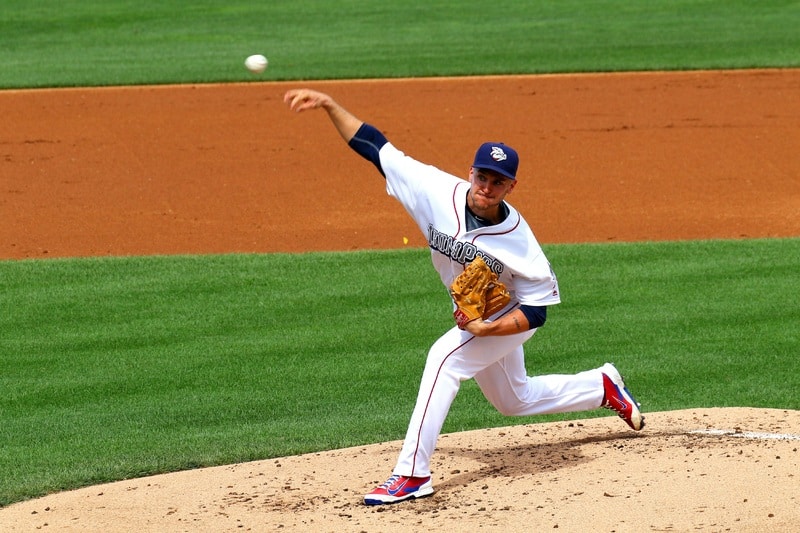
Following the pivot and leg lift, the pitcher must perform a stride in order to produce the velocity and positioning needed to comfortably release the ball toward their target.
The stride is performed by the pitcher driving their back foot off the rubber and striding forward toward the plate with a leg kick. The length of the stride is relative to the height of the pitcher and what feels comfortable: too short a stride makes the ball go low, while too long a stride makes the ball go high.
During the striding motion, the glove-side foot should remain closed, where after the moment the striding foot lands, it opens up and points toward the plate. In turn, the pitcher’s hips open up and bring the upper body through.
The toe and heel of the striding foot must land simultaneously to avoid any jarring in the delivery of the pitch; keeping the knee straight while doing so helps to subdue undue stress and strain on the front leg.
6. The Follow Through
The follow-through is essential for completing a pitch to ensure speed, control, and proper fielding position. When releasing the ball, the pitcher should ensure their pitching arm snaps across their body and the pitching foot swings around to a position that squares the pitcher up to the plate.
Once the pitcher brings their foot forward, they should be in the ready position, ready to field anything hit their way. Because the pitcher is the closest player to the batter, the pitcher must ensure they remain vigilant and keep their eyes on their target so they can field any balls that may be hit toward the mound.
Pitchers can practice this motion by utilizing the towel drill.
Conclusion
Pitchers are one of the most involved players on the defense because they are involved in every play. While pitching may have a lot of fundamentals to understand, practicing these fundamentals can ensure any player becomes a successful pitcher.
Before you become a great pitcher, you must first be great at throwing a baseball. Make sure you know the 3 fundamentals of throwing a baseball. Pitchers are also the closest player to the plate so make sure you also know the 7 fundamentals of catching a baseball and the 5 fundamentals of catching a fly ball.
1 thought on “6 Fundamentals Of Pitching In Baseball”
Comments are closed.